
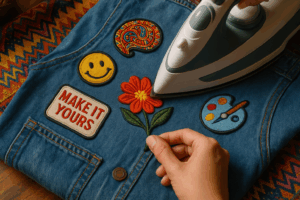
If you’re a DIY lover or fashion enthusiast, you know there’s nothing quite like personalizing your gear. Iron-on embroidered patches are a quick and stylish way to add flair to jackets, jeans, bags, and more. But how do you apply them without ending up with a wrinkled mess or a patch that falls off after one wash? Don’t worry—Patchcrafts.com has your back!
In this guide, we’ll walk you through how to apply iron-on patches like a pro, so your designs look sharp and stay put.
What You’ll Need:
Before we dive in, gather these essentials:
-
Your iron-on patch (grab your favorite from Patchcrafts.com!)
-
An iron (no steam!)
-
A clean, flat surface (ironing board or hard table)
-
Thin cloth or parchment paper
-
The item you want to decorate (cotton or denim works best)
Step 1: Check the Fabric
Not all fabrics are iron-on friendly. Ideal materials include denim, cotton, and canvas. Avoid stretchy fabrics like polyester blends, nylon, or leather—they may melt or not hold the adhesive well.
💡 Pro Tip: If your item is made of delicate or heat-sensitive fabric, sew your patch instead (we’ll cover that in a future post!).
Step 2: Prep the Surface
Make sure your fabric is clean and wrinkle-free. Iron out any creases first. Lay the item flat on a hard surface. Avoid soft or uneven surfaces—they prevent the adhesive from bonding properly.
Step 3: Position the Patch
Now comes the fun part—deciding where to place your patch!
Once you’ve found the perfect spot, double-check alignment and spacing. Is it straight? Is it where you want it to stay forever? Good. You’re ready.
Step 4: Apply Heat (The Right Way)
Set your iron to the “cotton” or “high heat” setting—without steam. Steam can interfere with the adhesive.
-
Place a thin cloth or parchment paper over the patch to protect both your iron and the embroidery.
-
Press the iron firmly over the patch area for 15–30 seconds, without moving it back and forth.
-
Apply even pressure—press down firmly so the heat activates the adhesive.
🔥 Pro Tip: For extra hold, flip the garment inside out and press the iron on the reverse side for another 15 seconds.
Step 5: Let It Cool
Resist the urge to peel or touch! Let the patch cool for at least 5–10 minutes. This gives the adhesive time to bond with the fabric.
Once cool, gently test the edges. If they lift, repeat the pressing step for another 10–15 seconds.
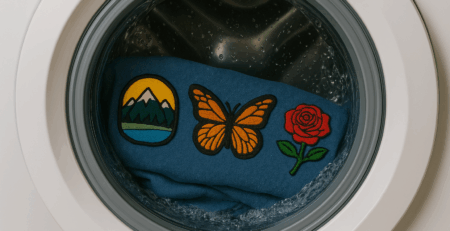
Step 6: Care Tips to Make It Last
Now that you’ve nailed the application, here’s how to keep your patch looking fresh:
-
Wait 24 hours before washing.
-
Wash inside out, on a cold gentle cycle.
-
Avoid dryers—air drying is patch-friendly.
-
No ironing directly on the patch after it’s applied.
FAQs – Quick Fixes & Troubleshooting
Q: My patch is peeling off. Help!
A: No worries. Place a cloth over the patch and reapply heat and pressure. If that doesn’t work, consider sewing around the edges for reinforcement.
Q: Can I use a heat press instead of an iron?
A: Absolutely! A heat press gives even pressure and is perfect for bulk applications. Use similar settings: 300°F (150°C) for 10–15 seconds.
Q: Can I iron patches on hats or curved items?
A: You can, but it’s tricky! For hats, try using a heat gun or mini iron, or opt for sew-on patches instead.
Why Choose Patchcrafts.com?
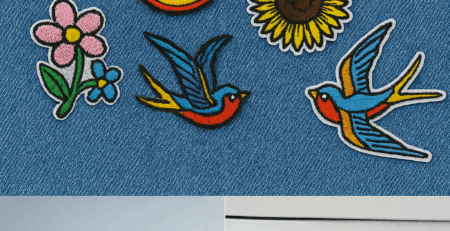
At Patchcrafts.com, we’ve been crafting high-quality embroidered patches for over 20 years. Whether you’re decorating a denim jacket or building a custom patch collection, our iron-on patches are made to stick, stay, and stun.
With vibrant threads, strong adhesive backing, and over hundreds of unique designs, we make your DIY dreams a reality—one patch at a time.
Final Thoughts
Applying iron-on patches is easier than you think—and way more fun than scrolling endlessly on social media. With just a bit of heat and patience, you can transform any plain piece into a personalized masterpiece.
So go ahead—grab your favorite patch from Patchcrafts.com, fire up your iron, and get creative. You’ve officially leveled up to patch pro!
Ready to start patching? Browse our latest iron-on designs here.
✨ Stay tuned for our next DIY tutorial: How to Sew on Patches by Hand – No Machine Needed!
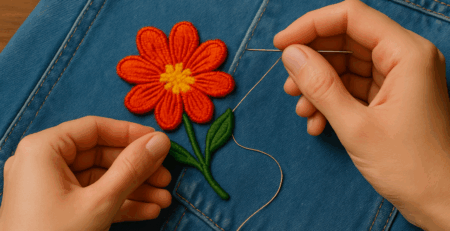
How to Sew On Patches by Hand – No Machine Needed!
How to Wash and Care for Embroidered Patches (Without Ruining Them)
Show Your Team Spirit: 7 Cool Ways to Use Sports Logo Patches

Fly Your Colors: 6 Meaningful Ways to Use Flag Patches
Patch Perfect: How to Wash and Care for Embroidered Patches

Creative Patch Projects for Beginners: 7 Easy DIY Ideas to Try
Iron-On vs. Sew-On Patches: Which One Should You Choose?
Top 10 Trending Patch Styles This Year
How to Start a Patch Collection: A Beginner’s Guide
